A cluttered closet can be a source of daily frustration. Finding the perfect outfit becomes an impossible task, and valuable pieces often get lost in the chaos. Fear not! In this blog post, we'll guide you through seven simple yet effective steps to turn your closet into a haven of organization and efficiency. Say goodbye to the clutter and hello to a beautifully organized wardrobe. You may also check out our Instagram where we have shared step-by-step guides and checklists to have a clean and organized home and cupboard of course. CLICK HERE
Step 1: Empty, Sort and Declutter
The first step in any closet organization project is to start with a clean slate. Remove all items from your closet and lay them out in a designated area. This allows you to see everything you have and provides a clear canvas to work with.
As you go through each item, ask yourself: Have I worn this in the last year? Does it still fit? Is it in good condition? Create separate piles for items to keep, donate, and discard. Be ruthless in your decision-making; it's time to bid farewell to the items that no longer serve you.

Step 2: Clean and Repair
With your closet empty, take the opportunity to give it a thorough cleaning. Dust shelves, vacuum the floor, and wipe down surfaces. Inspect for any needed repairs, like loose shelves or hooks, and address them now. A well-maintained closet will serve you better in the long run.
It is also a good time to clean your clothes and do the laundry. You can try products like laundry basket with lid or laundry basket with wheels for keeping track of laundry.
Step 3: Assess Storage Needs
Before you start placing items back into the closet, consider your storage needs. Do you require more hanging space for clothes or additional shelving for shoes and accessories?
Think about incorporating storage solutions like hanging organizers, drawer organizers and dividers, and storage bins to maximize the use of space. Invest in quality organizers, storage spaces, and even movable storage spaces like MOVE EASE to enhance and expand your storage space.
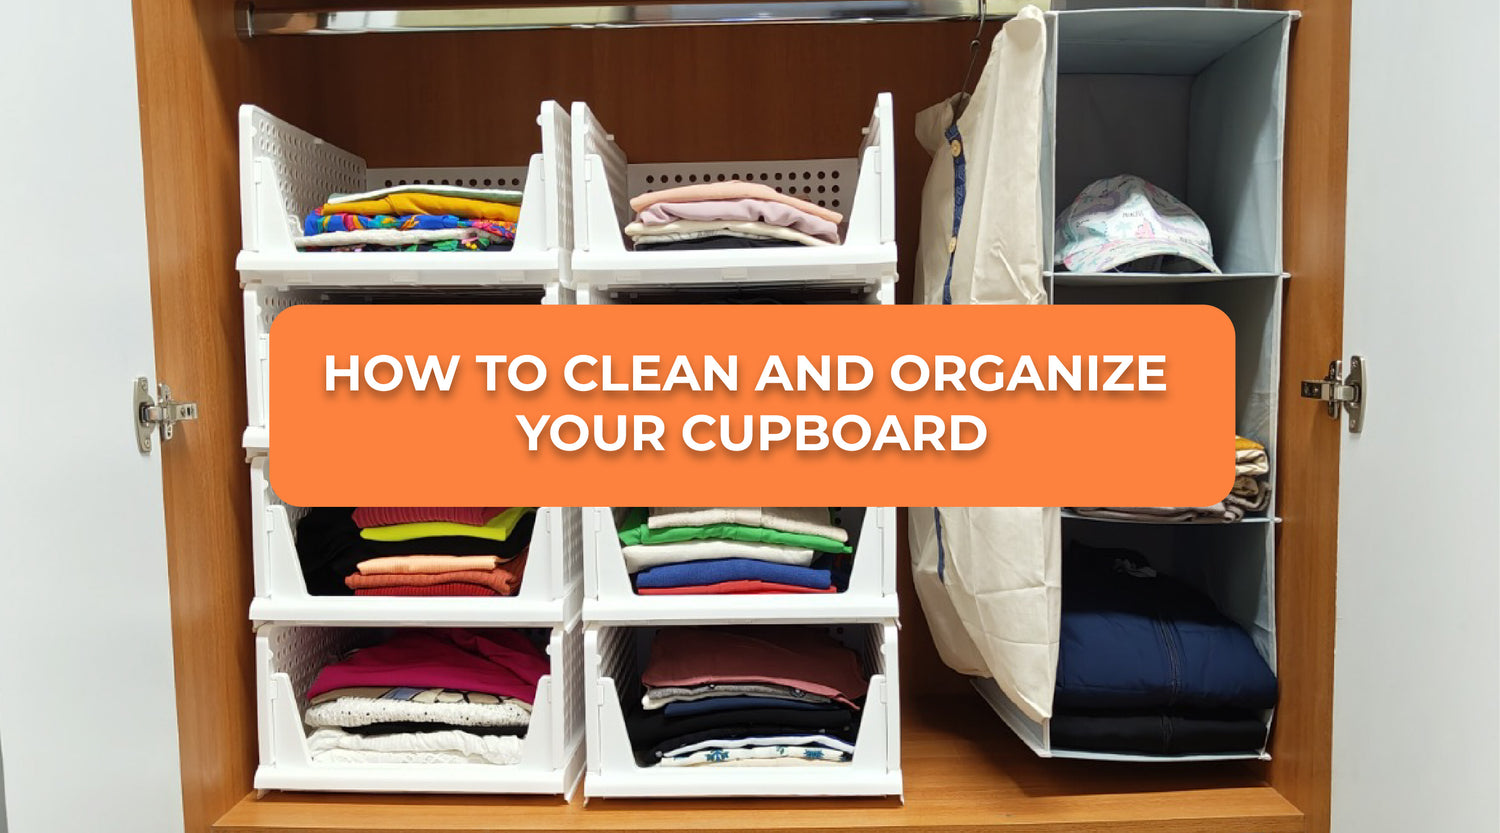
Step 4: Group Items by Category
Organizing your closet begins with grouping similar items together by category. This means creating distinct sections for different types of clothing. Common categories include tops, bottoms, dresses, and outerwear. By doing this, you establish a clear and logical layout, making it much easier to locate specific items when you need them. Use products like Stack it up , shirt stacker to organzie the first half of your wardrobe, and use Saree covers to sort and organize clothes in other sections of your cupboard.
This initial categorization sets the foundation for an organized and efficient closet space. Having designated areas for each type of clothing reduces clutter and streamlines the process of selecting outfits.
Step 5: Store by Season & Occasions
Once you've established the main categories, the next step is to further refine your organization. One effective way to do this is by subdividing within each category based on season or occasion.
Subdivide by Season, organize your clothes based on the seasons in which you wear them. Keep your current season's clothing at the forefront for easy access. For example, during the summer, place lightweight and warm-weather clothing within easy reach, while stashing winter items in a less accessible area. When the seasons change, swap them out accordingly. Store seasonal clothes in large storage bags like 100 liters clothes storage bag or choose an underbed organizer to store bedding and linen etc.
Step 6: Utilize Vertical Space
Don't forget to make use of the vertical space in your closet. Install additional shelves or hooks higher up for items like hats, bags, or seasonal items that are not used as frequently. This will help you maximize every inch of available space. We highly suggest you add wardrobe essentials like Hanging shelfs which come in 2 or 3 layers and easily add extra space to your cupboard which is strong and spacious both.
Step 7: Sort & Organize Intimate wear
When it comes to storing and organizing undergarments and intimate wear in your wardrobe, it's important to keep them neat and easily accessible. One effective solution is using an undergarment organizer like the one from Homestrap. This organizer comes in a set of four, and its compartments are designed to keep bras, panties, and other intimate apparel neatly separated.
The breathable fabric and transparent windows make it easy to see and select the right item without rummaging through your drawer. Simply place it in your wardrobe, and you'll have a tidy and efficient storage solution for your undergarments. Check out the HomeStrap undergarment organizer set HERE to add a touch of organization to your wardrobe.
Conclusion
By following these seven steps, you'll not only transform your closet into an organized oasis but also streamline your daily routine. Remember, organization is an ongoing process, so stay committed to maintaining your newfound order. The key to a well-organized closet is consistent maintenance. Regularly assess your wardrobe to ensure it remains clutter-free. Embrace the peace and efficiency that comes with a clutter-free closet. Happy organizing!

